When you are ready to move toward more advanced templates like our Amped Effects, it's important to understand how to mask your images. We'll show how you to mask (or cut out) your images to design beautiful custom photo products for your clients. You can download the complete infographic on Photoshop Masking (.jpg file). We also invite you to PIN IT, so you can go back and find it anytime!
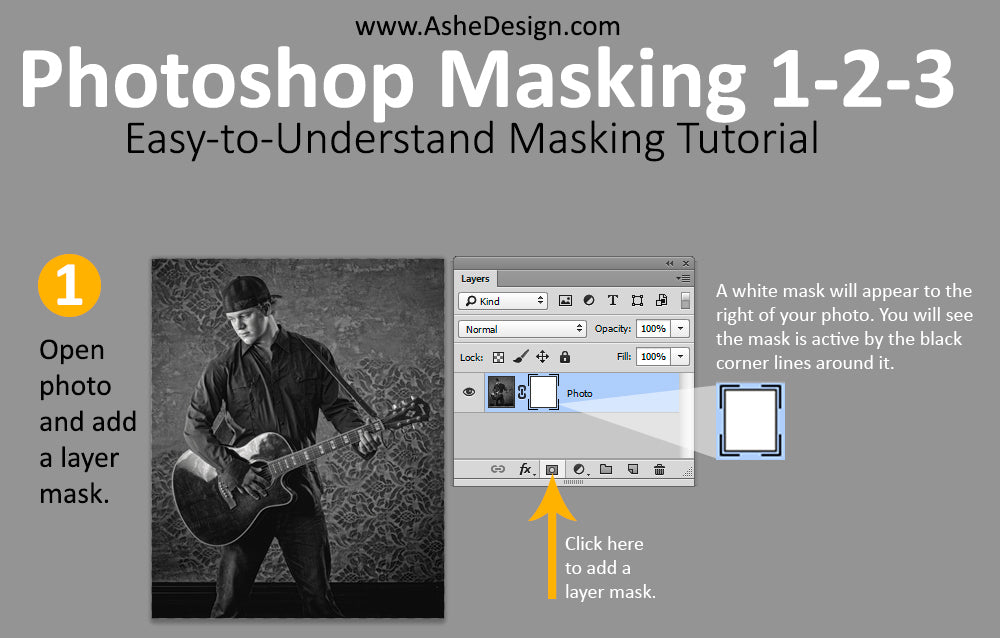
Step 1: Open Photo and Add Layer Mask
With your image open, click the icon at the bottom of the Layers Palette to create a "Layer Mask." A white mask will appear to the right of your photo. You will see the mask is active by the black corner lines around it. See the image below for an example.
Step 2: Paint on Your Image with a Black Brush
Now, with an active layer mask in place, you can use the black brush to start erasing away the parts of the image you no longer want to keep. As you paint on your image, you'll see the mask fill with black. As you paint, it will remove areas of your photo revealing the layers beneath.
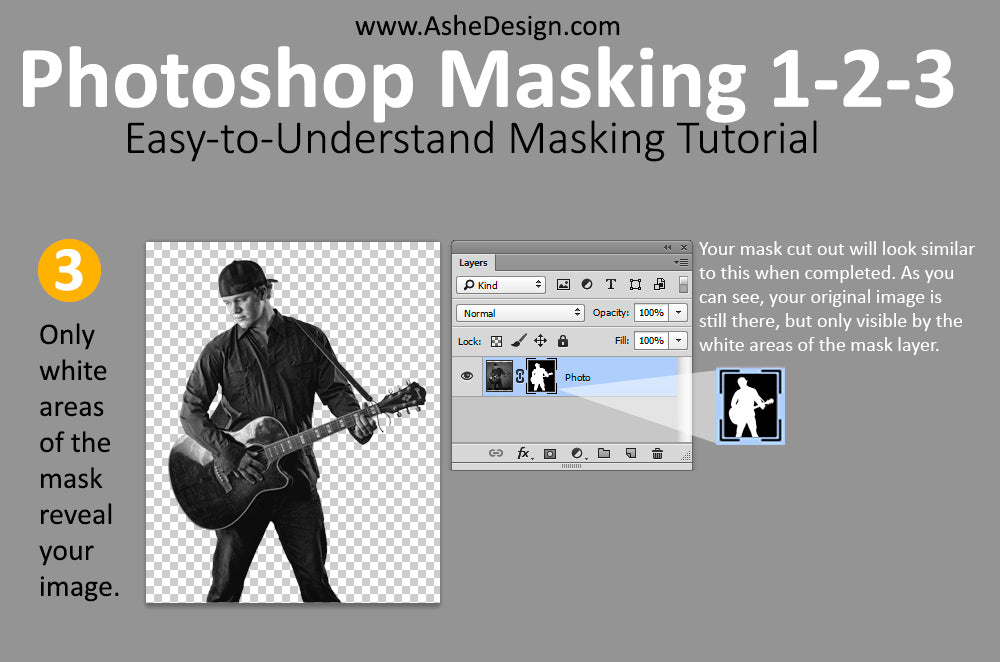
Step 3: Finish Masking Your Image
Continue using your black brush to paint on your image, removing any part of the photo you no longer wish to keep. Only the white areas on your mask will reveal you image. Your finished product will look similar to the example below.